If you’re domain is using the Microsoft 365 email – otherwise known as MS Exchange – it’s likely you will need to update your SPF, DKIM and DMARC records within your domain DNS at some point. From February 2024, Yahoo (Yahoo Mail) and Google (Gmail) require email validation for large volume email senders, but it’s good practice to add these records now nevertheless as they’re also often used by spam filters to distinguish between junk and legitimate email. As far as I’m aware, there are no current plans to require these changes for everyday email users, however, in my opinion it’s only a matter of time.
Microsoft Exchange – add required SPF record
Your domain DNS should already contain the following SPF record:
- Record: TXT
- Host Name: @
- Points to address or value: v=spf1 include:spf.protection.outlook.com -all
- TTL: 1 hr
Microsoft Exchange – enable / add DKIM
Generate DKIM keys within the Microsoft 365 Admin Centre:
- Sign-in through the M365 admin centre as a global administrator
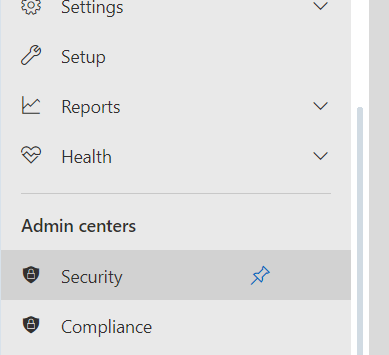
- In the left-hand menu, click on Security under Admin Centres. This will take you to the Microsoft Defender Portal.
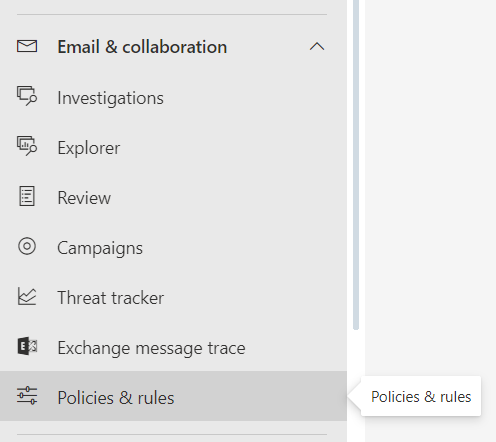
- From there, Under Email & Collaboration – click on Policies and Rules –> Threat policies –> Email Authentication Settings
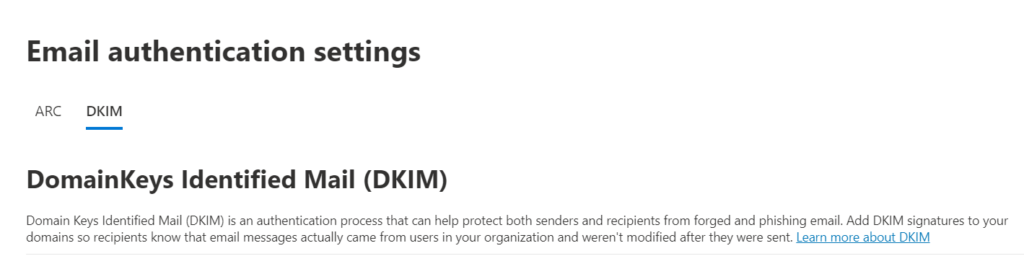
- choose the DKIM tab and you’ll see the ‘DomainKeys Identified Mail (DKIM)’ tab with your domain name(s) below it
- Click on the domain name you’d like to activate DKIM on and enable the DKIM under ‘Sign messages for this domain with DKIM signatures’
At this point, you will probably be shown an error message saying that the required CNAME records do not exist. Within this error message you’ll be shown the CNAME records you need – add them to your domain DNS. Once they have been added, updated and they have resolved, you will need to go back to step 1 and follow the instructions again (see below for the client error message example)
How to configure and add a DMARC to your domain:
Your DMARC record will need to be generated before being added to your domain name. Many hosts will do this for you. Here is how to do it manually:
- Generate your DMARC record using a third party record generator such as: https://dmarcian.com/dmarc-record-wizard/ (this is a third-party website and the link opens in a new tab)
- Once your record has been generated, add your DMARC record to your DNS
Microsoft 365 Admin Centre – DKIM error message example
As mentioned above, if you try to activate DKIM before you have the correct CNAME records within your DNS, you will get an error message. Here is an example of that message where you will find your CNAME records:
Client Error
|Microsoft.Exchange.Management.Tasks.ValidationException|CNAME record does not exist for this config.
Please publish the following two CNAME records first.
Domain Name : *****.***
Host Name : selector1._domainkey
Points to address or value: selector1-*****.***._domainkey.********.onmicrosoft.com
Host Name : selector2._domainkey
Points to address or value: selector2-*****.***._domainkey.********.onmicrosoft.com .
If you have already published the CNAME records, sync will take a few minutes to as many as 4 days based on your specific DNS. Return and retry this step later.
The basic syntax of the DKIM CNAME records for custom domains that send mail from Microsoft 365 is:
Hostname: selector1._domainkey Points to address or value: selector1-<CustomDomain>._domainkey.<InitialDomain>
Hostname: selector2._domainkey Points to address or value: selector2-<CustomDomain>._domainkey.<InitialDomain>
Further healp
Here is the Microsoft help page for how to Set up DKIM to sign mail from your Microsoft 365 domain: https://learn.microsoft.com/en-gb/microsoft-365/security/office-365-security/email-authentication-dkim-configure?view=o365-worldwide